In SOLIDWORKS, you can create a helix or spiral curve within a part. These curves are commonly used as:
- A path or guide curve for swept features.
- A guide curve for lofted features.
Steps to Create a Helix or Spiral:
1. In a part, do one of the following:
- Open a sketch and draw a circle.
- Select an existing sketch that contains a circle. (The circle’s diameter defines the starting diameter of the helix or spiral.)
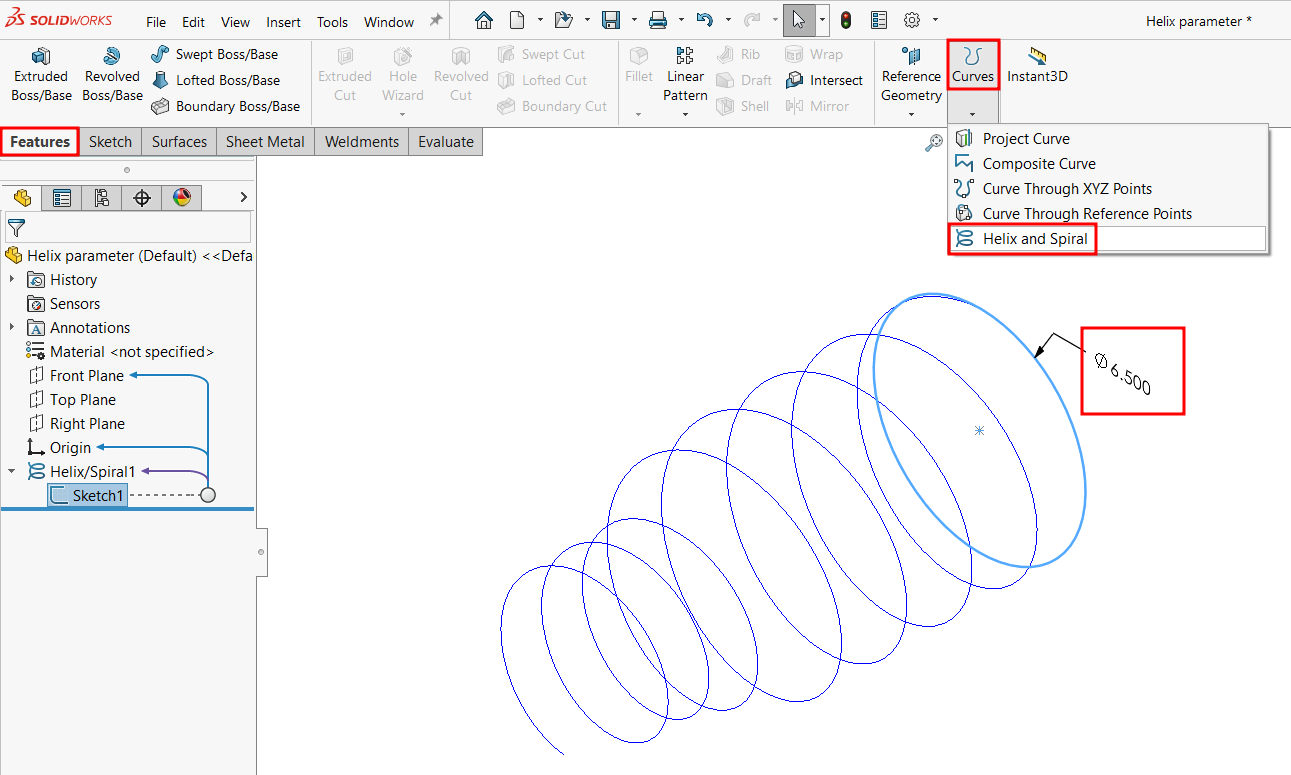
2. Go to Curves toolbar > Helix and Spiral, or select Insert > Curve > Helix/Spiral.
3. In the Helix/Spiral PropertyManager, set the required values (Pitch, Revolutions, Height, Diameter, etc.).
4. Click OK to generate the curve.
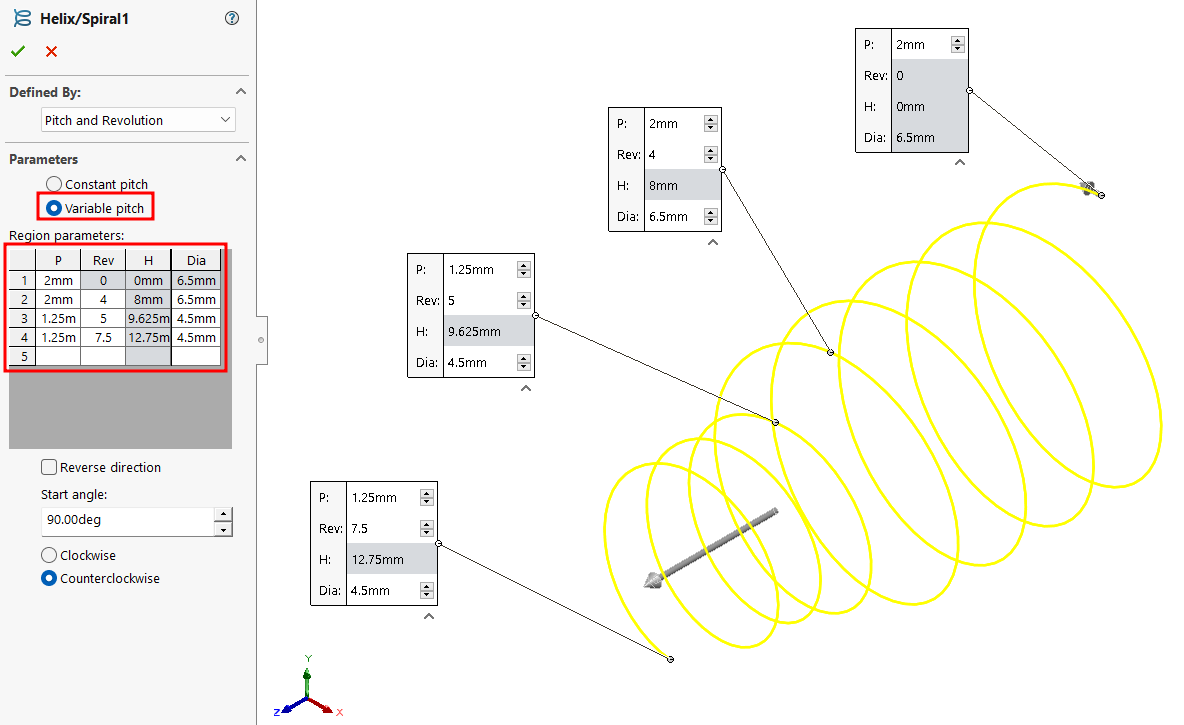
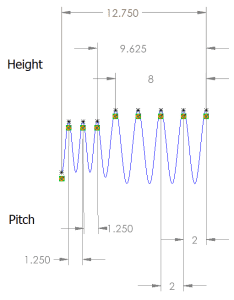
Variable Pitch Option:
Using the Variable Pitch setting, you can create a helix with a pitch that changes across different regions. This is controlled in a table where you define:
- Revolutions (Rev)
- Height (H)
- Diameter (Dia)
- Pitch (P)
This flexibility allows for advanced geometry creation, useful in applications like springs, threads, or custom swept features.