The Shell feature in SOLIDWORKS can be customized to apply different wall thicknesses to different faces. You can remove faces, set a default thickness for the remaining faces, then set different thicknesses for faces you select from the remaining faces.
Steps to Create a Multi-Thickness Shell:
1. Click Shell on the Features toolbar or go to Insert > Features > Shell.
2. Under Parameters, set the default thickness for the part.
3. Under Multi-thickness Settings:
- Click inside Multi-thickness Faces tab.
- Select a face from the Multi-thickness Faces list and enter the desired thickness in Multi-thickness.
- Repeat this step for all additional faces you want to modify.

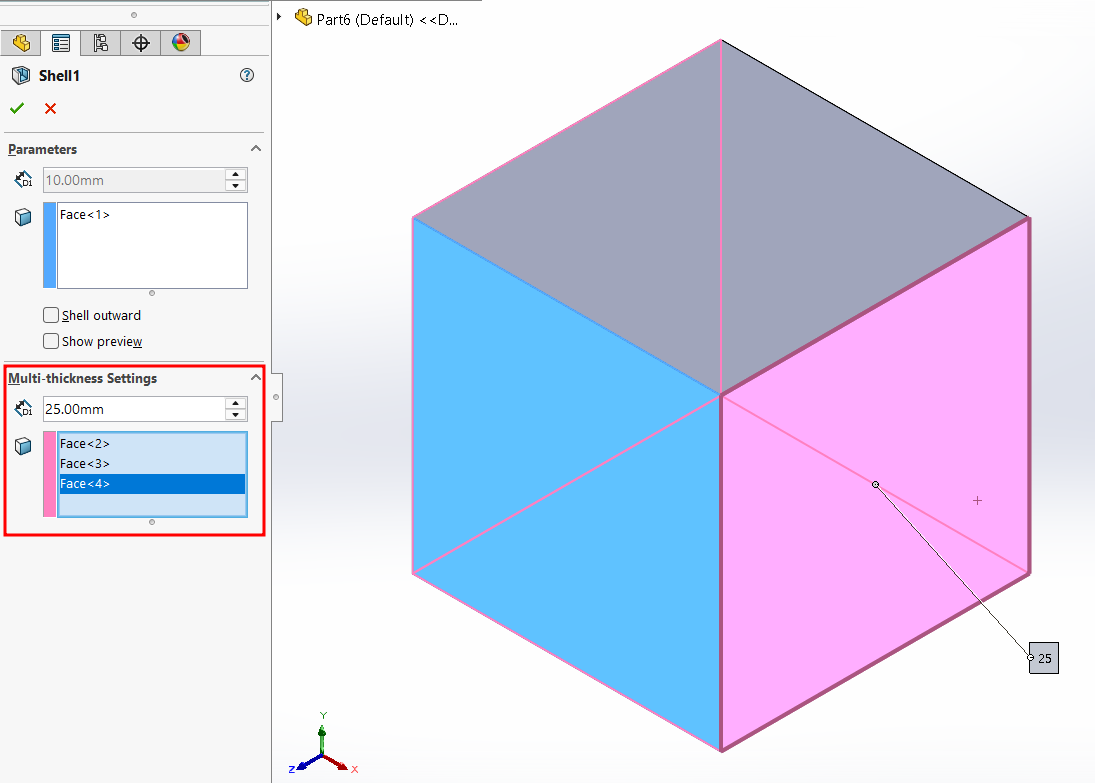
4. Click OK to generate the shell.
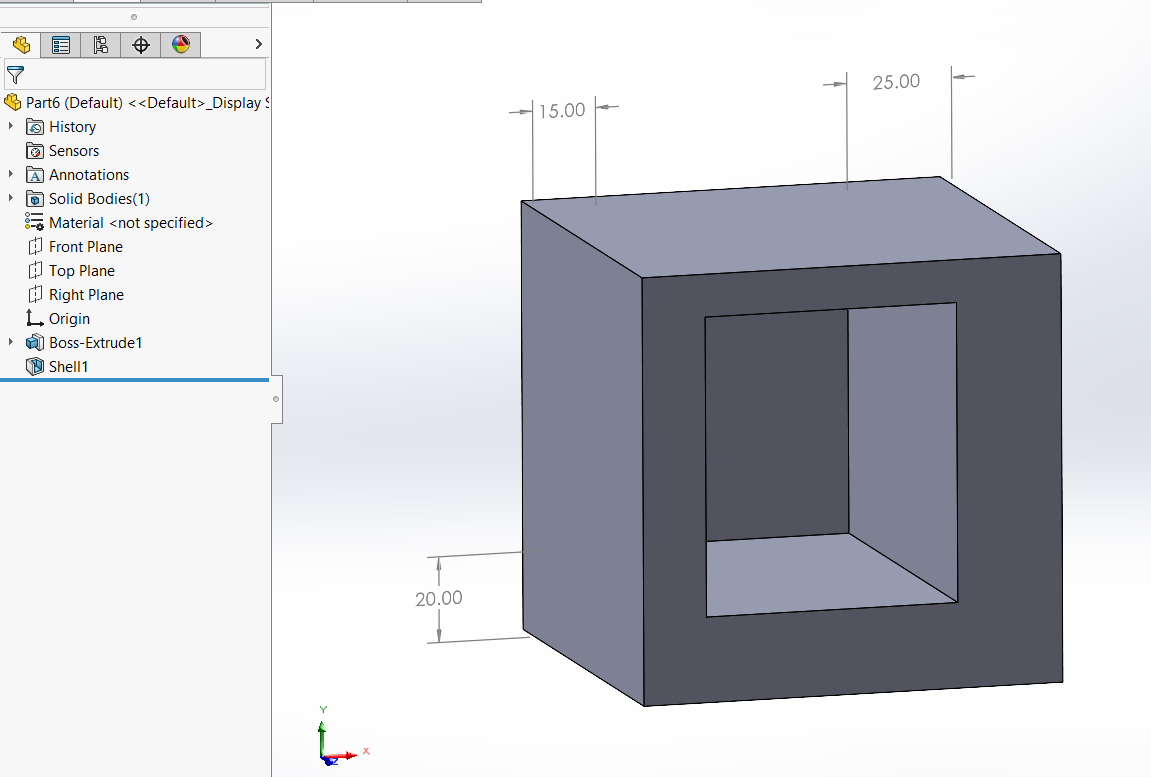
This option is useful for designs that require varying wall thicknesses, for example, housings, enclosures, or cast parts that need localized strength.